Index
Rebedding Deck Fittings and Windows
Using Polyglow to bring back the shine
Installing and using a Raymarine ST1000 Plus
Modifying the 12 volt Electric Onboard
Compass for my needs Plastimo, Iris 100
Adding a Pressure Water System
Replacing Rub Rail
Adding a Bimini Top
Adding Folding Transom Ladder
Replacing Toe Rail with Plasteak
-----------------------------------------------------------------------------
O'day 25 Centerboard Pendant (Top)
The new style of pendant is now just braided nylon rope, no wire. If it is replaced every year of so you should not have any problems. If you don't mind swimming under the boat you can change this in the water. Starting in the cockpit I dropped a fishing weight attached to fishing line down the pendant tube. I then attached the new pendant line to the fishing line and feed it down the tube. Now it was time to swim under the boat and grab the end out of the centerboard trunk, making sure it is tied off in the cockpit, first. Put a small shackle on the end and attach it to the centerboard. I was able to do this in about 15 minutes out anchored just off the beach.
Another centerboard problem, centerboard stuck in the up in the well (Top)
In the past few months my centerboard has started to get stuck in the well when I pulled it up all the way. When I would go sailing it would drop after a while leading me to believe that I had thing building up in the trunk or on the board. Well, this time the board did not drop and as you O'day 25 sailors know she sure doesn't sail well with the board up. I wasn't able to push any down the pendant hole for the centerboard and exhausting all options like going over big waves it was time to go in the water and work from the bottom side. It's wintertime in Florida (February) and the water has only gotten to 60 degrees in the gulf but I decided to take it out to the beach and jump in anyway. I cleaned the bottom first with a brush taking off any algae and small barnacle growth that has built up over the winter. The bottom wasn't bad for not being touch for about 4 months. It was now time for a mask and to swim underneath to try to pull down the centerboard. I got a pair of channel locks and went under in the murky water. I was able to see the board and grabbed hold. With one light pull the board dropped about six inches, the same amount I had tied off on the pendant in the cockpit. I let the centerboard down all the way and continued to clean it with the brush. This will be and area I will have to address when I pull the boat for the next bottom job.
-----------------------------------------------------------------------------
Re Bracing the Transom
After coming back from Jacksonville, Florida to St
Petersburg I noticed my transom was pushing in under power. I had originally
thought the engine was just too strong. I decided to reinforce the transom with
a ¾ piece of plywood. When I started grinding down the inside of the transom to
remove the gel coat, I saw the glass had delaminated from the plywood sandwiched
transom. (Have a
GOOD particle mask and goggles!) I decided to go farther and grind off the glass
on the inside of the transom. After grinding around the edge I was able to
easily lift the layer of glass away from the rotten wood underneath. This was
now going to be a bigger job than I had expected. I took a putty knife and
removed the rest of the wood. The wood is only on the starboard side on my
O’day 25, just to beef it up for the engine mount. I went to a local supplier
of fiberglass and resin (Fiberglas Coatings, Inc http://www.fgci.com/
) and got some valued information. They suggested I grind away the edges smooth
again and install a new transom backing with epoxy. The original backing went
almost to the edge of the hull, so I ground down the gel coat about 4 inches
from where the transom backing ended. I then created an epoxy mush and placed it
on the ½” Klegecell to be installed that replaced the wood. I found there was
no way to make plywood conform to the transom curve. I used a long poles to brace
it in place against Klegecell to push it up against the transom. I also place 2
screws with large washer through the engine mount holes to pull the wood snuggly
up to the transom. Using the excess epoxy I filled any voids around the edge and
smoothed it out. Now that the new backing is in place I picked up fiberglass in
a mat and roving combination. I was told that each layer of this fiberglass (mat
and roving) was equal to a piece of 1/2 “ plywood. Instead of the original one
layer of glass I decide to place two layers. (Make sure you have a fan when you
start glassing in that tight area the fumes can really get to you.) The right
tools are necessary. Make sure to have a small fiberglass roller to get out any
air bubbles in the glass. It also helps to have a friend to help with making up
the resin. If you make a full container it tends to fire off before you get it
all in and up. My first try the resin kicked off before I got the layer of glass
up. With some left over glass I was able to put a third layer where the engine
mounts holes were. After the glass was in and sanded smooth I was able to put
new gel coat and finish out the inside of the transom area better than when I
bought it.
Core material
Klegecell GS -A foam core material that is scored allowing it to conform to curves. Nominal sheet size: 48" x 32".
Fiberglas Coatings http://www.fgci.com/
Fiberglass Coatings, Inc. provide products and support to individuals and to major manufacturers of composite fabricated products alike. A wide variety of products and supplies to fit almost any application. Visit the showroom at 4301A 34th Street N., St. Petersburg, FL 33714-----------------------------------------------------------
Having carburetor trouble with the Honda 15 outboard (Top)
If you have read the article on sailing from Jacksonville to St Petersburg you know I had great luck with the Honda 15 hp outboard. Since then my economy of the engine has gone away and it is now fouling plugs on a regular basis. I have gone to the local Honda dealers to try to find out what is going on. They both tell me that the Honda carburetor has very small ports inside and it is a common problem getting clogged. When clogged on some ports it makes the engine run richer than it should. I asked how to take care of this and was told by both to bring it in and they could clean the carburetor. FOR $200 or more dollars. It takes about 10 minutes to take off the carburetor from the engine and disassemble to a point of cleaning. I guess our dealers just need some extra money and I looked like the one to supply it this month. I have now put a good inline fuel and water filter in the hose leading to the engine.
-----------------------------------------------------------
Rebedding Deck Fittings and Windows (Top)
After getting the boat back home I wanted to check the deck fitting (stanchions, cleats, handrails, etc.) so they were not leaking. I started doing this piece by piece. The stanchions were the first to be removed. Make sure to check the coring between the deck and inside. On my boat all was fine but I have heard that it can be a problem. I found something like plumbers putty under each of the fittings. Some of it had turned hard and I assumed it was the original sealant on the boat. Since we were sealing metal to fiberglass I chose to use a marine grade silicon to use as a sealant. I didn't want to use 5200 in fear of having to do it again in the future. I put a generous amount on the fitting and some around the thread of the bold giving good protection down into the hole. I replaced the fitting and pulled the fitting down snuggly with the nuts leaving a little more to be pulled down. Make sure you use an good amount silicon, enough to be squeezed out around all the edges I then scraped the excess silicon away with a putty knife and remove the excess acetone. After letting the silicon have a few days to harden I then snugged the nuts. So far no problems with any leaks. I continued around the boat doing the bow pulpit, cleats, caps to the side stays and any other fitting that could leak.
Window were next to be removed and resealed. I started with the fore ports, all are non-opening. I remove all the screws, inside and out and was able to push the window out on to the deck. Make sure to take care because the plastic could have become brittle from the sun and age. Scrape the sealant from the outside portion of the window, again taking care of not to damage the plastic like I did with my putty knife. After all is scraped away I wiped it down with a minimal amount of acetone. Make sure not to get any on the Plexiglas because it will fog the surface. I also had to remove the Plexiglas from the window housing because the sealant had started to release. Again, a little more work than I expected, but necessary. I continued around the boat doing all six windows.
-----------------------------------------------------------
Cetol Refinishing of Teak (coming soon) (Top)
As soon as a little time goes by I will complete the info on my experience with Cetol.
Gloss Cetol on hand rail
Toe Rail with out being oiled for 5 months. I sure hope this Cetol lasts longer than the oil.
-----------------------------------------------------------
Using Polyglow to bring back the shine I bought the Polyglow kit at the Miami Boat Show in February. As soon as I get around to using it I will let you know. (coming soon) (Top)
-----------------------------------------------------------
Installing and using a Raymarine ST1000 Plus Tiller Autopilot (Top)
This was one of the first investments for my O'day 25 before ever bringing her home. I can say it was money well spent!!
(more information coming soon)
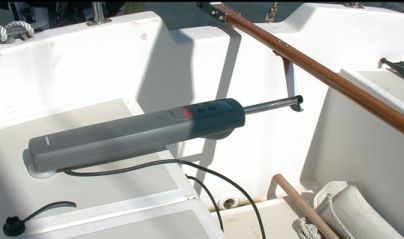
The Raymarine ST1000Plus is mounted on the starboard side. A hole was drilled in the seat to accept the holding pin for the unit. A stainless steel piece was purchased from West Marine and bent to make up for the difference in height between the tiller and the autopilot arm.
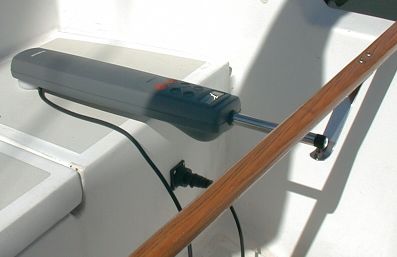
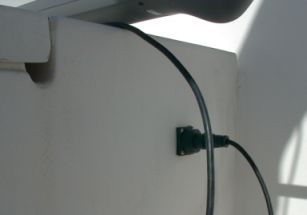
A hole was drilled on the inside of the cockpit to place the electrical connector for the unit. This carries the 12 volts for power and also the information from my GPS for waypoint navigation.
-----------------------------------------------------------
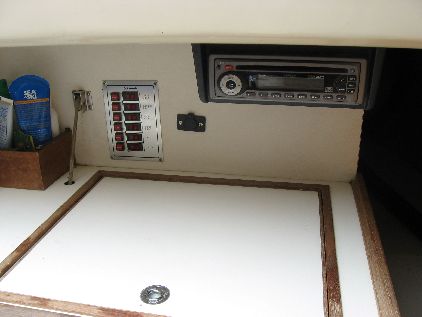
Modifying the 12 volt Electric Onboard (Top)
Adding Dual Batteries
Replacing 12 Volt Power Panel
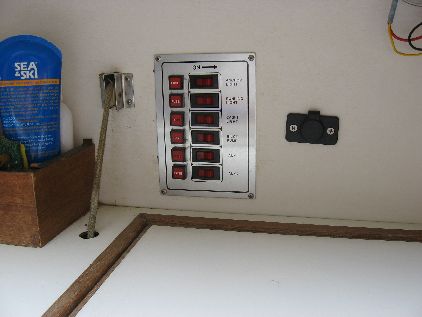
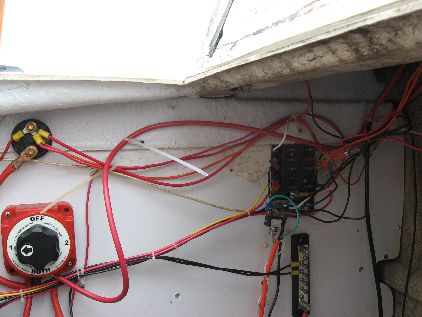
Adding 12 Volt 45 Watt Solar Charger
Adding Mast Head VHF Antenna w/Wind Indicator
-----------------------------------------------------------
Adding a Garmin GPSMAP 76 with MapSource Bluechart for my area and interfacing with my autopilot (Top)
As we all know the GPS can give you direction, speed, average speed and more. After doing more cruising with my GPS I have found out more to use even though I don't cruise off shore. Recently, summer of 09', I took a trip to the Florida Keys from the Melbourne area of Florida, keep mostly to the Intercoastal. With the Bluechart software I planned my courses down and back before I left on the trip. Of course the GPS helped estimate my time over distances I could travel every day. I found I need to come back very quickly and had to sail late into the night a few evenings. With one of the screens on the GPS it told me how many feet left or right of the center of the channel I was. It would also show the marks that I was approaching in the dark so I was prepared for them as I passed.

-----------------------------------------------------------
Compass for my needs (Top)
I decided to purchase a Plastimo, Iris 100 hand held compass for my sailing. Thought not a real powerful compass it suits my needs. I has a dual purpose for me. A hand bearing compass for fixing location and with the supplied deck mount it works well as a steering compass. I purchased a second deck mount and change the compass from side to side when necessary. P.S. You can get these compasses lighted or non-lighted. If you are looking for a compass like this check out Ebay. There is a company called Marisafe out of Sarasota that has great deals on the Plastimo products on Ebay.
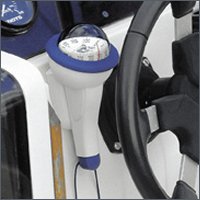
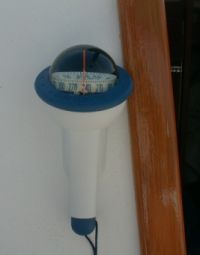
Picture on left from Plastimo and on right is compass mount on port side of O'day cockpit
-----------------------------------------------------------
Adding a Pressure Water System (Top)
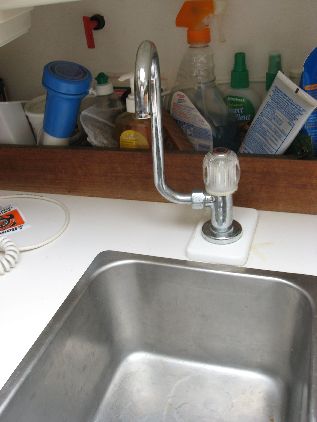
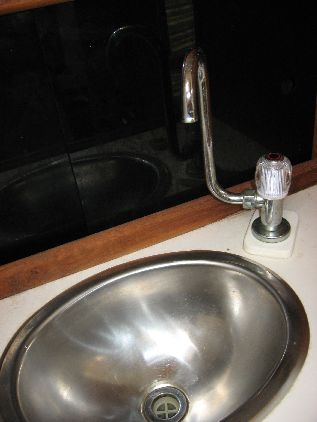
Single handle faucets for the galley and head sinks
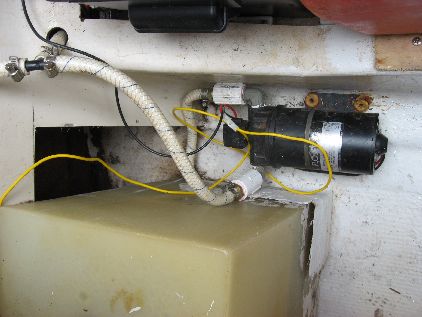
Pressure pump coming of water holding tank
-----------------------------------------------------------
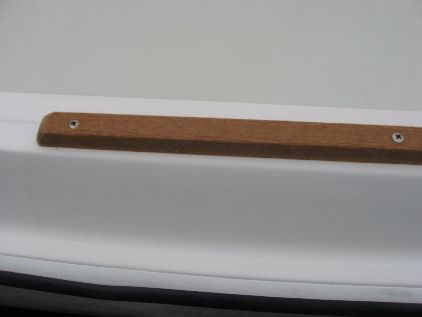
Replacing Rub Rail (Top) (coming soon) http://www.hamiltonmarine.com/
-----------------------------------------------------------
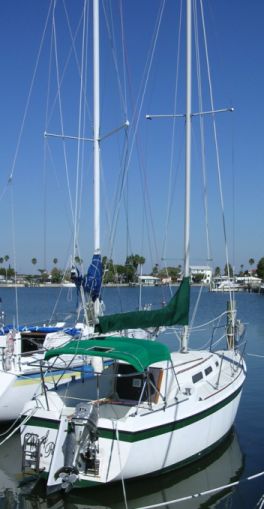
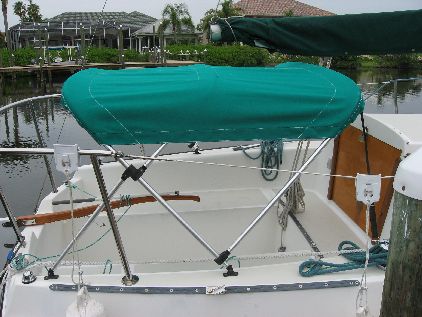
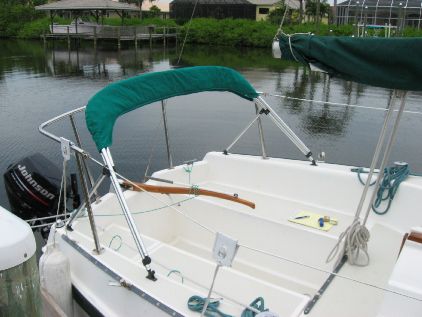
Adding a Bimini Top (Top)
Here are some pictures and measurements for what I have on my boat. Make sure you measure your boat before buying because distances may be different.
My bimini is 54" front to back, the top is 60" side to side and the base/feet is 72" side to side. The height opened is 32" from the deck. As you see from the pictures it could be a few inches taller (closer to the boom). I would not recommend the top to be any longer because it would cut over the hatch and make it more difficult to get into the cockpit.
As you can see from the covered bimini it makes a nice clean look in the back.
As for the mainsheet attachment I went to West Marine and got a new tang to add to the boom. Mine is placed 10.5 inches forward of the old one. If I were you I'd wait until you have the bimini installed to place yours.
The cost on my bimini was $150 because I was lucky enough to find a new one at a salvage yard in the area. There are very few boats with biminis this small so it may be a tough one to find pre made..
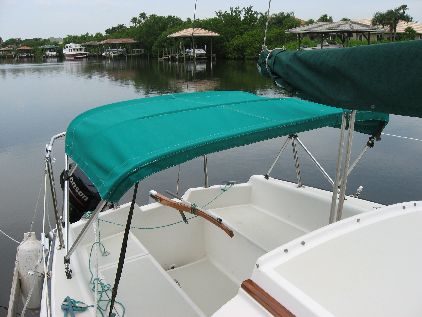
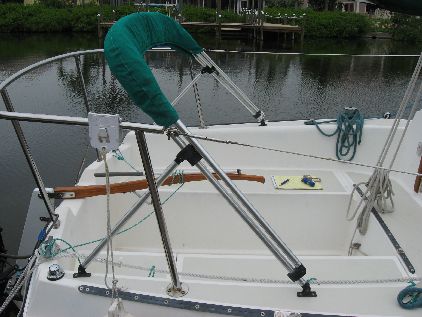
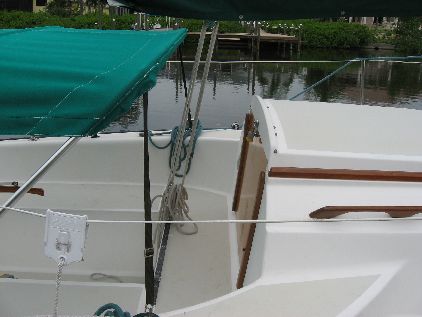
Not much room left with the bimini so close to the hatch
-----------------------------------------------------------
Adding Folding Transom Ladder (Top) (coming soon)
-----------------------------------------------------------
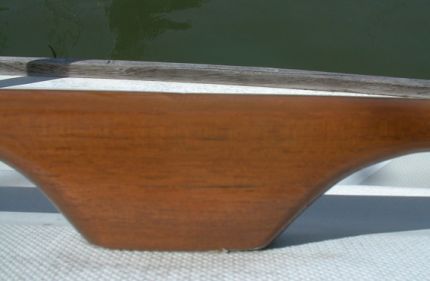
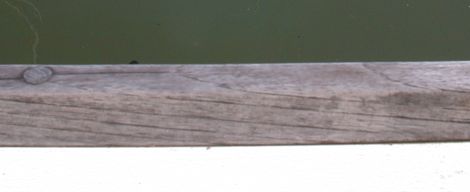
Replacing Toe Rail with Plasteak (Top) http://www.plasteak.com/
Old teak toe rail
As for the toe rail I purchased the 1/2" x 2 1/2" x 12'. Since I don't have a table saw I took it to a wood worker and had him trim it down cutting off 3/4" on the out sides of the length. I had Plasteak cut it in 6' lengths for shipping. I used oval head screws to mount it and did not use plugs. As for the hand rail I used the 7/8" stock. I marked it with the old hand rail and cut it with a hand held jig saw. ( A lot cheaper than letting them cut the rails and much easier than I thought.) After cutting it to form I used a hand held router to round the inside of the rail. I marked the holes from the inside and drilled the mounting holes. It really worked great. I also did the hatch boards with 1/2" by 9" stock Plasteak. I notched the edges so it wouldn't leak. Plasteak is a more flexible than wood so I braced it on the back. I used left over pieces of the 1/2" x 2 1/2" for the boards that hold the hatch boards. The only thing I recommend is to counter sink the holes and don't have too much pressure with the screw or it will split the plastic. The only thing I have left that's wood is the tiller which would bend if I used Plasteak.
So far I have had Plasteak for 3 years and everything is working great. Use a good caulk like 5200, I used a lot and wiped off any extra.